
Union Fitness 101: How to use the Ski Erg
posted on April 16, 2018
Unless you’ve been hiding under a rock, you’ve probably noticed the new equipment in the Cardio Lab by now. If you’ve been lucky enough to participate in one of our HIIT, Grit, or Hybrid Flow classes, you’re most likely super familiar with the ski erg. It’s one of our favorite pieces of cardio equipment here at UF. Most traditional cardio equipment (think treadmills, bikes & ellipticals) focus on the lower body. Although you might end up developing a love/hate relationship with this device, it is by far one of the most efficient pieces of equipment to work the upper body.
We know just looking at the ski erg can be quite intimidating for newbies so we put together a how-to guide for those looking to add some upper body cardio into their routines.
Set-up/Technique:
There are two main techniques for the arms: Straight up and down (think ski poles) or Circles (think butterfly stroke).
There are two main techniques for the legs: Hip Hinge (think fatbell swing) or Squat (think more knee bend).
You can mix & match your styles and techniques throughout your workout!
Common Mistakes:
Back rounding
Avoid this mistake by keeping your back as flat or neutral as possible. It helps to think about keeping your shoulders back or squeezing your shoulder blades together.
Knees locked out
Avoid this mistake by always keep a slight or soft bend in the knees.
Not finishing the pull
Avoid this mistake by making sure you always finish your arm extension.
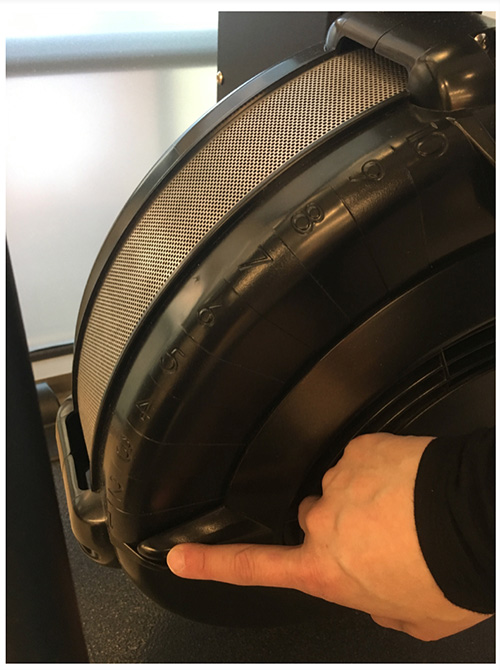
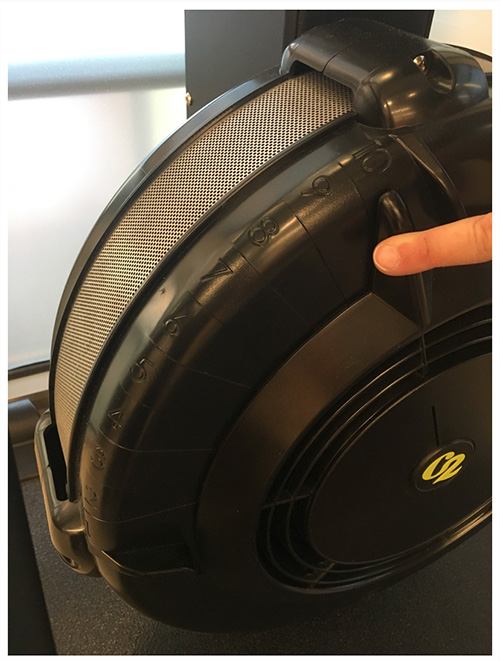
Damper Setting:
The damper is the numbered lever on the side of the fan cage, from 1-10 (same as the row machines!) It controls how much air flows into the cage with each pull. Higher damper settings allow more air into the fan cage, but more air means it takes more work to accelerate the pull. Simply put: the lower the setting, the easier the pulls feel and vice versa.
However, it’s easy to confuse the damper setting with the intensity level of your workout. A higher damper setting does not necessarily mean a harder workout. The intensity level is independent of the damper and is completely dependent on you. It depends solely on how much you choose to use your core, legs and arms to move the handles. The harder you pull, the more resistance you feel!
Monitor:
How to turn the machine on:
As soon as you start your first pull, the machine will automatically turn on and start calculating.
How to change the units of measure:
We commonly use calories or meters to calculate or measure workouts in classes. To change the units on your screen, follow the video instructions below.
That’s just about all there is to it! The best way to learn is really to give it a try yourself, so hop in on a Cardio Lab class ASAP.
Read More
